Friday 4 November 2011

Kitchen Update


House is coming up smoothly. I guess our Lord is really blessing us and helping us along the way. We had very good weather when we are suppose to transport the wood to our home; no rain, all sun while the rest of Singapore was pouring with some area flooded. We are indeed bless to meet with many good suppliers and service providers too.

Our always on time contractor - Ah Boon from Jipson Contractor (He really takes pride in his work)
Our very motherly wood supplier - Dolly from Tat Hin
Our good kitchen equipment supplier - Wendy from Universal Union
Our table frame maker - William from Westie
Our kitchen cabinet installer who goes all out to help - Dee from FD Dimension

Ground leveled and tiles laid!


Kitchen cabinet installation

Now with all major works done, we are off to our honeymoon!

Monday 17 October 2011

Up and coming Kitchen

Stopped cooking for awhile now since we got our keys to our first home. Now Hub and I basically running from place to place to get appliances, lightings, aircon, etc to do up our new house. Many many things to consider, loads of things to buy but we are happy. ^_^

Here's the up and coming kitchen before renovation.
Original Kitchen...smaller than it looks


I've got my fridge, oven, dishwasher (yes this is absolutely necessary for me!), hob, hood all ready for my up and coming kitchen! We even got a 16pc set for our meals.

Here is the work in progress! We are leveling the ground, new floor tiles for my small but sufficient kitchen.

The wall is for my backsplash. Yes, sink will be there :)
 
This weekend fresh paint will be up! We are also making our own dining table with Balau wood as the table top. I can't wait to see it...expected arrival on 28 Oct!

Monday 26 September 2011

Gift from Hubby!

Who says romance stop when the wedding bells has rang? Received this from my hubs in office today! Surprises and wanting to give the other a surprise is always heartwarming ^_^

My First Julia Child's Book
~ Guess Hubby wanna me to learn the basics first

Saturday 24 September 2011

For my mother

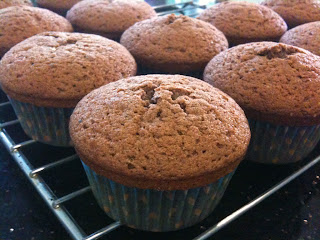
Did a little variation to the chocolate cupcakes. I substituted the cocoa powder with 1/2 cup of dried cranberries. Still the same white chocolate frosting but with 1 1/2 tsp of milk to get rid of "sandy" texture.

Place the Happy Birthday right in the middle and walla!

Tip on the cranberries: Pour hot water over the dried cranberries to get rid of the extra sugar if you do not like the cupcakes to be too sweet. After pouring the water away, dry them with a paper towel to remove excess water and leave it to cool before putting them into your batter.

Tuesday 20 September 2011

Chocolate cupcakes with white chocolate frosting (Part 2)

Got down to baking and making the cupcakes last Saturday. However, the frosting that I chose to make was a disaster! It was too runny and at room temperature, the frosting goes totally FLAT! I should have smell a rat when it goes off the basic of creaming butter and icing sugar together. So, I got to discard the whole frosting. (total waste of my good white chocolate and cupcakes!)
Recipe rating 1/5 for the frosting. It not only does not hold its shape at room temperature, the vanilla has overpowered the white chocolate taste. The plus point is that this frosting has a very nice shine.

The search for another white chocolate frosting begins. Finally selected this for my new white chocolate frosting:
Romantic Rose Cupcakes

Final recommended recipe as follows:


for the cupcakes (make 24 cupcakes)
300g unsalted butter at room temperature
300g caster sugar
6eggs
300g self-raising flour
6tbsp cocoa powder

for the white chocolate frosting
200g white chocolate
280g unsalted butter
280g icing sugar

To make chocolate cupcakes:
1. Heat oven to 180C/fan 160C/ gas 4
2. Cream butter and sugar together till light and fluffy. Remember to scrape the sides with a spatula from time to time.
3. Beat in the eggs and flour
4. Add cocoa powder
5. Spoon into muffin tins lined with the paper cases till 3/4 full
6. Bake for 12 minutes
7. Leave it to cool


To Make White Chocolate Frosting

1. Melt chocolate over a double boiler (which is just a heat proof bowl on top of the sauce pan with boiling water)
2. Leave to cool.
3. Beat the butter and icing sugar in a large bowl until creamy. (I prefer to add the icing sugar gradually)
4. Beat in the chocolate
 5. Leave it in the refrigerator for 5minutes and you are ready to frost your cakes!
On a side note: if you have the time, you can make the frosting 1 day in advance and chill it in the fridge. This will bring out the chocolate taste even more. Bring it down to room temperature before using again.

The best thing about this frosting is that it does not go flat and pretty shape still holds at room temperature!

Feedback from my hubby (the one that matter most!): the frosting is a little too sweet but when eat together with the cupcake, it is just nice.
Feedback from friends: Nice! Cupcake not dry.
Feedback from my mother: The frosting feels a little "sandy". Overall nice.

Rating for this recipe: 4/5 Good for parties!
When I do this again, I will add 1-2 tbsp of milk to the frosting for a smoother texture.

Thursday 15 September 2011

Chocolate cupcakes with white chocolate frosting (Part 1)

This weekend, I will be attending a BBQ party. 
Theme: Smurf or things in Blue and White. 

In our culture or at least in my family, it is never nice to go to friend's house empty handed. So, I thought to myself, this theme is really hard considering not a lot of BLUE food around. 


Yesterday I walked around Carrefour supermarket for inspirations and guess what I found. Sweet blue and white cups for cupcakes! So this is what I thought of: Chocolate cupcakes with white chocolate frosting since I do not need to worry about the "blue" element.

 
Surfing the net for recipes and I came across these two recipes:


When comes to chocolate cakes, the sponge is the most important to me. I enjoyed rich chocolaty ones cause I am a HUGE fan of chocolate and nothing beats the satisfying, aromatic sensation in your mouth - Yum!

I can't wait to try out combining these two over the weekend!


Recipe to follow in my next blog and of course, with pictures!!! Stay Tuned!